
Range of Light Photography™ | Techniques | Making an iBook
Making an iBook

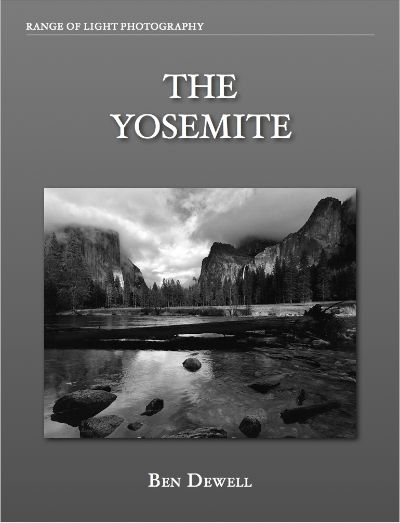
My primary motivation to publish an Apple Multi–Touch iBook was based on the desire to provide quick worldwide outreach for my fine art gelatin silver prints in classic fashion to collectors and prospective buyers. The need to provide relatively inexpensive items at exhibitions as takeaways was also important, as students and other visitors who were as yet either incapable of, or uncommitted to, the purchase of a fine art print, wished to have something representative of my work. Two nominally priced exhibit format Multi–Touch iBooks, THE YOSEMITE and THE RANGE OF LIGHT, to be followed by others, now join notecard sets in this price category, as well as the free technical articles I write for this site.
The choice of e–book publishing platforms, despite the difficulties that ensued, was barely a choice at all, for one very compelling reason, Apple iTunes. At the time of this writing, betting against existing Apple marketing platforms simply does not seem a reasonable strategy.
That said, Apple's iBook Multi-Touch Author (IBA) publishing software proved to be immature for my specific needs, and kludgy in general. It was only with great persistence that I was able to overcome its shortcomings and bend the software's will to my liking. Bear in mind that anything communicated in this article will almost certainly (hopefully) be superseded by improvements in the IBA software programs and future updates. Given Apple's historical commitment to education, I can only assume that many of the bugs and difficulties I experienced using IBA version 2.1.1 will be corrected, and many new, expanded facilities and exciting template layouts will be forthcoming.
This article is not a tutorial on iBooks Author. For that, I recommend viewing the many on–line tutorials, either on YouTube or the training videos of on–line learning sites such as Lynda.com. But, and more to the point of my writing this article, many of the concepts and strategies offered in them are either flat out wrong, or incomplete in regard to producing anything other than a common textbook. While I am certainly no expert at IBA or book design, what follows is some hard won guidance and a few experienced tips for working with IBA with respect to the publishing of a quality photography oriented digital book. It is hoped that the prospective photo iBook publisher would come here first, and then return as problems crop up to quickly solve issues before they become hair–pulling tests of resolve.
I. WHY MAKE AN APPLE MULTI–TOUCH IBOOK
Here is the most important thing to remember as you explore IBA. IBA was created to produce textbook style books. The value added multi–touch functions are intended to assist readers in comprehension and concept. Before one dedicates one's time and talents to the IBA software, the question should be asked and answered, how will my photographs and message benefit from the multi-touch functions that make this format so useful and unique? Moreover, the textbook approach may need to be overcome in order to produce a book of one's own useful design. If these concerns cannot be answered definitively, employing standard e–book formats for digital publication may prove more useful. One may produce a simple iBook, translated into the general e-book format, for distribution through the Apple iTunes Bookstore. The on–line self publisher Blurb offers this service for their existing published books for a small fee. Be aware however, that even though all the work of a previously published volume may be retained in a simple page turn style, none of the exciting and value added multi-touch features that make the Multi-Touch iBooks so unique will be available. You will need IBA to produce a Multi–Touch format book. IBA may be downloaded free from the Apple App Store. iBooks are created on your Macintosh computer with IBA and previewed on your iPad.
Keep in mind that, at this time, Multi–Touch iBooks are restricted to use in the iBooks reading app on Apple iPads and Macintosh computing platforms running OSX Mavericks or later. Just as Apple is sure to keep improving the IBA software, I feel pretty confident that other operating systems and devices will soon support Multi-Touch iBooks as well.
If you decide to go ahead and dive into IBA, are new to Apple iTunes distributing, and need to meet some sort of publishing deadline, you would be well advised to download the iTunes Producer software and set up an iTunes Connect account on–line well before finishing your book. Not doing so will likely add days and possibly weeks to your schedule as Apple requires verified tax IDs and bank accounts in order to distribute funds for books for sale. (Those who are existing publishers with Apple iTunes of apps, music, etc. will already be familiar with this process.) iTunes Producer will allow you to assemble your iBook package for upload to Apple through iTunes Connect.
One of the basic recommendations given in the on–line IBA tutorials is how easy it is to create your own template layouts by deleting all the text boxes and images, starting with a clean slate. Do not follow this advice! Instead, keep as many of the existing functions of any canned layouts as possible while designing your own, only deleting what is absolutely and clearly unnecessary to your final template page. In other words, delete only the lorum ipsums and retain the empty text boxes and image placeholders until you are certain that you have no need of them, or you may find yourself plenty of dolor.
As you begin designing your iBook, include as much general functionality and aesthetic into your layout templates before adding them in as actual individual pages of your book. This is where common page design elements will assist readers and speed the compilation of your book's unique content. For examples, see either of my iBook's common background, headings, and presentations to each fine art print page. Layouts are common to most text based software these days, and IBA's use of them is similar to other page design software programs such as Pages or InDesign.
Common to most software these days is the Inspector window, from which most functions are readily accessed. Keep it open. It is your friend. You will use it frequently to specify style and function. Many initial, seemingly intractable, design issues may be solved by the simple and extensive use of the functions within it. Just make sure that objects in the editing pane are selected for alteration as you apply changes in the Inspector.
Pages, sections, and chapters, along with each subcategory of style, are all pages to the IBA software, just as in any physical book. However, they all have different and specific functional characteristics in IBA.
As previously mentioned, failing to appreciate and observe the conventions IBA has set up to assemble text based books (e.g., textbooks), is likely to be the source of the many difficulties that may be encountered in creating picture based book paradigms. One of the primary constructs to be aware of is that text is intended to flow from page to page. The text boxes included in the many sample template layouts will allow text and intra–text hyperlinks to operate between separate pages, allowing you to link between parts of your book. This will only happen if you use the page layout templates offered, or construct flowing text boxes between pages yourself. If your particular book design allows for this and aesthetic insertion of images, then the contemporary, magazine style photo book layout may serve you well. Simply use a layout template of your choice and change it within its restrictions and insert away. For my part, every included layout had the look of a textbook, not the classic fine art monograph I was after. One of the important restrictions of using the template pages format is that, because of the requirement to flow text from one page to the next, new pages may not be inserted between existing pages, meaning that an iBook using page templates may only be updated at the end of each chapter. Again, if that serves your needs, then you are golden. However, if you intend to update your work in some logical and aesthetic manner other than simply appending new images to the end of your "chapters", then you will need another approach.
If you wish to retain the ability to insert new pages at will, either during the initial editing process or within later versions, you should use section layout templates as individual pages for your iBook, instead of page layout templates. The functional difference between pages and sections is mainly that you will no longer be able to flow text between pages, and thereby link text from page to page (i.e., intra–link), as sections are viewed by IBA as discrete. You can, however, still do everything else with sections as you would with pages, including adding text boxes and external links at will.
Chapters are treated by IBA the same as sections with one important distinction, they will not be visibly numbered within the book (per physical books).
The iBook glossary, though an important item of any textbook, should not be underestimated as a forum to explain and footnote your work, methods and process. Elucidation and personalization, can go far in fleshing out your photographs and you to readers in a very important and yet subtle way. For examples see, "Tenaya" or "Taboose", in THE RANGE OF LIGHT.
Unfortunately, the glossary function is still quite basic and buggy. While the iBook's pages may have the increased functionality of videos, widgets and the like, the glossary is limited to simple images. Additional functions may be superfluous within the general textbook glossary, but in terms of a more highly evolved art book design, it may be preferable that these be referenced within a glossary.
The general advice to save writing the glossary until the very end of the book is sound. However, I think it nearly impossible to observe this convention given an ongoing editing process. Be that as it may, you may find it necessary to resolve orphaned terms and the like as you complete your book. Presumably, IBA's proofreader would catch such anomalies, and although it is recommended that it be used, it does not. A human proofreader you trust will prove invaluable in this regard.
The iBook's title will not appear on the iPad preview version, or as part of its identifying metadata unless you enter it in the "Book" pane of the Inspector (i.e., book icon, far left in the Inspector).
IBA's Table of Contents (TOC) is generated from the name you give each page, section, and chapter in the thumbnail or outline by editing each respective text field within the 'Book' pane to the left of the main editing pane, in the IBA window. Clicking on 'Table of Contents' will allow you to position the entries and Chapter Title a bit. Crucially, you can alter the text formatting of the table itself through the Inspector, which may be necessary to accommodate longer titles in the chapter/section list. The Inspector provides a 'Numbering' pane within its 'Layout' window for the TOC. You will just have to play around with it to appreciate and make its inscrutable, indecipherable function work with your tome.
If using the 'Line' option within the Stroke Function in the Inspector Window to construct borders for your images, be aware that every other border pixel width added will eat into carefully cropped images by just that much. I have often used this function in other web–based software and on my site to make quick and dirty, yet entirely suitable wide border picture frames for images. It was only after I nearly completed my first book design that I noticed some of my images were no longer full frame representations, forcing me to design the window mat style I eventually used in my books.
Including video, especially within the main body of the book, unless highly compressed and of no more than a couple of hundred megabytes, is best accomplished by linking to an outside server such as YouTube or Vimeo. Be aware that iBooks are restricted to 2 Gigabytes or less.
One of the important differences between simple e–books and a Multi–Touch iBook is the inclusion of an Intro Video, a short, compressed introductory piece for your book. While at first blush it may seem frivolous, today's consumers expect much more in their reading experience, and isn't that at least part of the reason to publish a Multi–Touch iBook? Look to iMovie, Final Cut Pro, or Premiere to make your video, and don't forget to compress it a la HandBrake or Apple's Compressor program.
Be aware that the text search function, 'Find', only operates within the body and glossary of any book. It will not search the TOC. Why on earth does this matter? My books were sent back from review by iTunes Connect twice because I had wantonly used the Apple trademarked term "iBook", within my iBook (?!?). 'Find' had not found it used on the labeled chapter title, from which it had become automatically generated as part of the TOC.
At some point, either within your book's content or for the purpose of providing screen shots for Apple's iBook Bookstore, you may need to get screen dumps of your book within iPad preview. Hitting the iPad's power button simultaneously (actually slightly first) with the front menu button will take a screen shot and place it into your camera roll. Simply "share" it with yourself (mail), take it into a photo editing program (Aperture works) to crop or make further adjustments, and then import it into IBA as an illustration or iTunes Producer as a screen shot.
You may either allow Apple to create a sample book for the iTunes bookstore for you, or create your own. I chose the latter approach as I did not want to give this function over to a random approach. Making a sample book of your own is easy. Simply delete any pages from your book you wish, retaining representative ones. You may need to renumber pages in their original sequence, so it doesn't appear as if you have a 5 page book. Export, from the file menu, the sample as a separate sample or preview file. It will need to have the '.ibooks' extension in order to be copied into the ITP book assets well (see below).
If you are already an established author, you may wish, and have good reason, to obtain an ISBN for your book. Without going into a lengthy discussion here of the pros and cons to their use, I will only say that Apple does not require them. Nor does Apple provide them. Publishers provide them. Apple is walking a fine legal line in their book "publishing" enterprise, and this seems to be a prime reason ($) why Apple does not provide ISBN numbers.
As mentioned at the outset of this article, you will need to download iTunes Producer (ITP) in order to deliver your work to Apple for review and distribution. There are two methods for getting your iBook into "Publication Assets", both being touted as superior by the helpful folks at iTunes Connect.
1) Use the 'Publish' button (next to 'Preview') from within IBA. This will create some partially filled out metadata fields within ITP, and most importantly, insert a compressed iZip file of your book into the assets 'Publication' well. Be advised: This will appear as an untitled, generic looking, iZip file. This is your book! The well will be empty if no book is present. One way of soft verification that this is indeed your book is to take a look at the 'Cover Art' pane to see whether the cover for the your book was indeed imported. The 'Publication Sample' well should be empty. If you have decided to create your own sample book for the bookstore, you will use method 2 to deliver that.
2) You cannot upload '.iba' files (e.g., the program files created by IBA) into ITP. They must be exported from IBA via the '.iBooks' extension file format. Simply use the 'Export' from the 'File' menu within IBA to create files of the '.ibooks' format for ITP. Once in the proper format, your book and preview files may be copied or dragged over into their respective receiving wells within ITP.
Metadata is the information necessary to describe and identify your book. Apple provides an extensive iBooks Publisher guide (pdf) on the iTunes Connect site. It specifies the ITP process and metadata functions in detail. I will only address a few points of potential confusion here. Unless you are working for an actual book publisher (in which case, why are you reading this?), you are the (self) publisher, and it is your name that you will enter as publisher within the text field in the 'Info' pane of the Book window. Under the 'Rights & Pricing' pane, will be found 'Physical List Price'. This is the price of your book, if it has already or would be published, as hard (i.e., physical) copy. If your iBook is only a digital book, you can only use your best judgement about this. To my mind, this is one of the ongoing transitional issues as the world moves inexorably from analog to digital. 'Cleared for sale' is a legal publishing definition which you are likely to simply leave checked as a self publisher. Checking 'DRM free' allows purchasers of your iBook to use it on any suitable device without repayment.
Well, not really. I'll try to add to this article and make corrections as the scars begin to heal, and/or I begin my next book. Please don't copy my iBooks' style. I look forward to seeing what creative styles you come up with when using IBA.


